Whether you’re creating a purchased assessment, or one in trial, many of the steps are shared. In this section, we’ll go over each individually.
Creating a Purchased Assessment
1. Login into your ComplyUp Account.
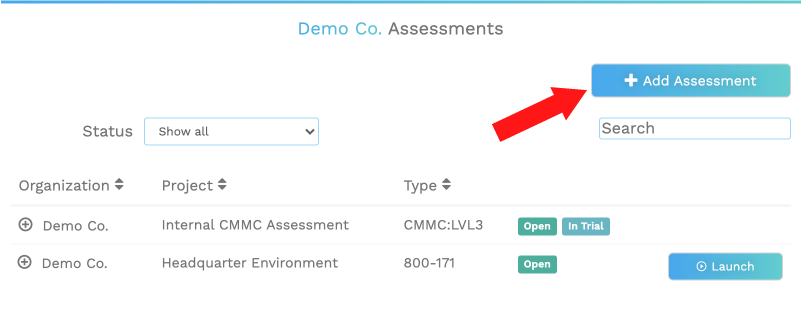
2. On the Account Dashboard / Assessments page, click the Add Assessment button in the “Selected Company Assessment” box.
MSPs:
You’ll need to select a Tenant from the drop-down menu and load into their Account Dashboard / Assessments page first.
You’ll need to select a Tenant from the drop-down menu and load into their Account Dashboard / Assessments page first.
3. In the “New License” popup window, select the framework you’d like to create an assessment for. Once selected, click the Next button in the bottom right corner.
4. After selecting your framework, a new popup window titled “Add Assessment” will open. Here you’ll see all available licenses for the selected framework in your account. If you’ve bought a bundle or have already purchased an assessment, you can’t access it here and continue to creating the assessment. If there are no available licenses, you can select the “get one here” link.
5. The next popup window will open and you’ll be able to read the license summary and click the links to read the Compliance Disclaimer and Terms & Conditions. When you’re finished, select the Continue button.
6. Following the next popup window, you’ll need to select the Quantity and optionally apply any discounts with the Apply Coupon link.
When finished, select the Proceed to Checkout button.
7. Next, you’ll need to fill out all the necessary billing information. When finished, select Next
8. Finally, you’ll then need to enter your credit card information. Upon entering your information and selecting Next, the platform will build your new assessment.
You’ll be redirected to your Account Dashboard / Assessment page and see Building Assessment…
This process may take up to 5 minutes.
This process may take up to 5 minutes.