After inviting a user to your account, you’ll need to add them to the assessment that they’ll be working on.
Locating Assessment Users & Permissions
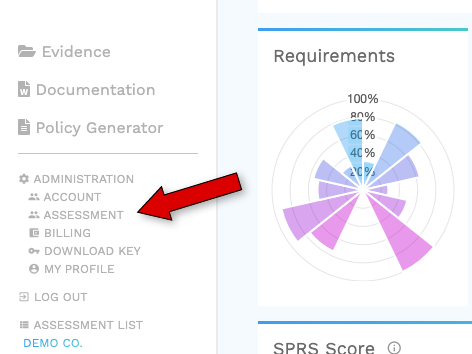
From the Assessment Dashboard, navigate to the left-hand panel and select the Administration dropdown. From here, click the link labeled Assessment to travel to the Assessment Users & Permissions dashboard.

Assigning Assessment Users
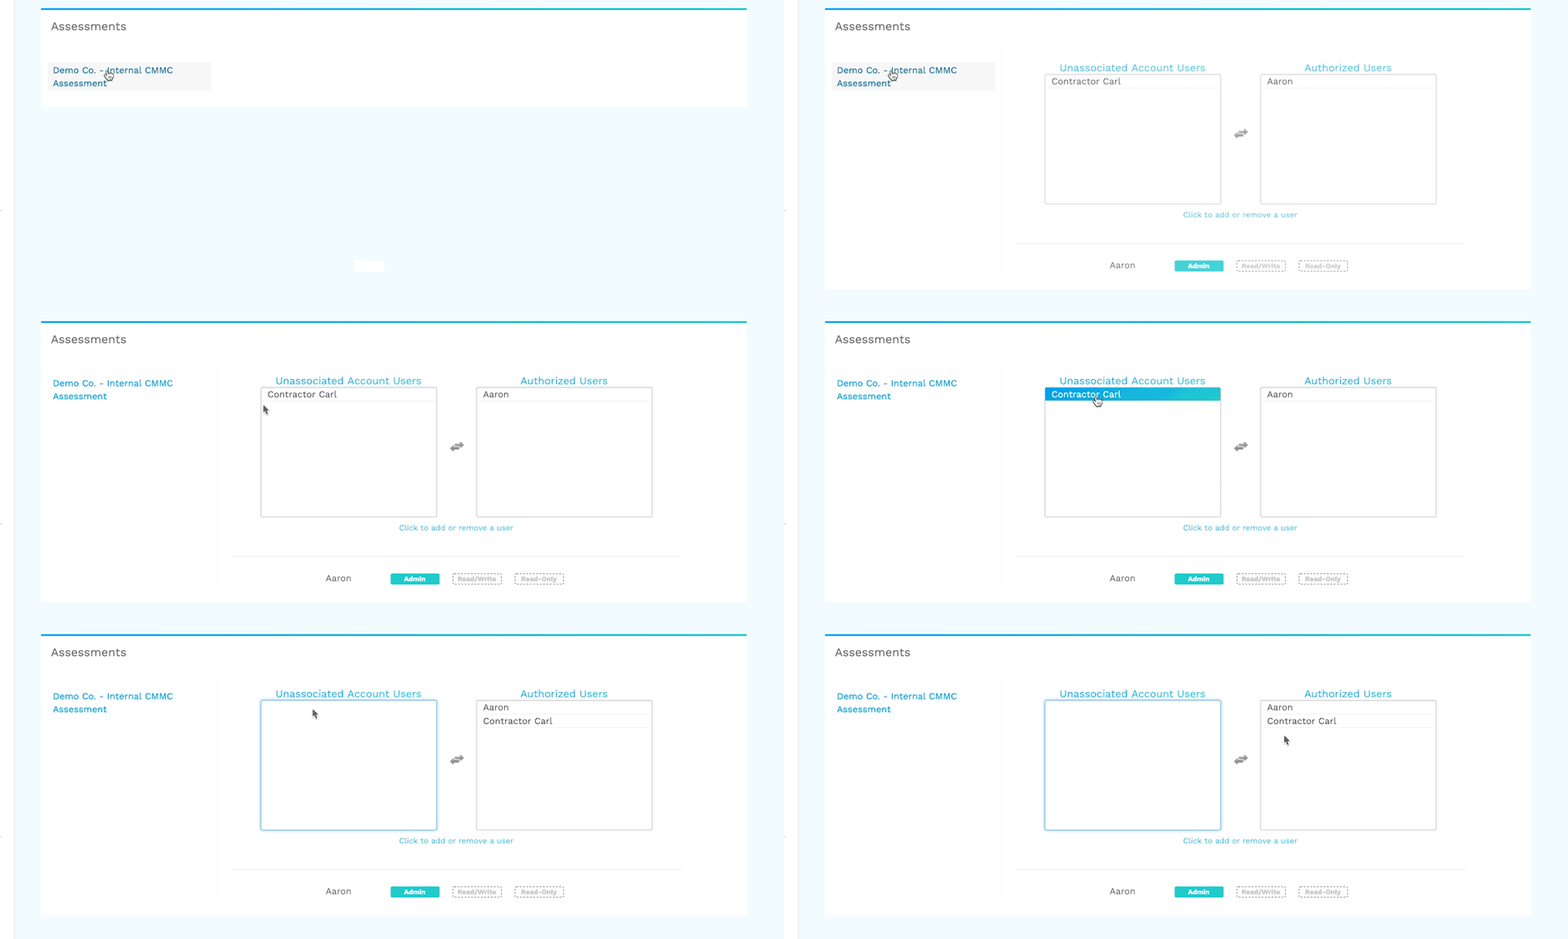
In the Assessment Users & Permissions dashboard, you’ll see all of your available assessments on the left and an unassociated / authorized user menu on the right. Select the appropriate assessment. You’ll see all account users grouped into one of the two categories: & Authorized Users.
To include an account user in the assessment that you’ve selected, click their name and they will be moved from “Unassociated Account Users” to “Authorized Users” or vice versa.

Assigning User Roles
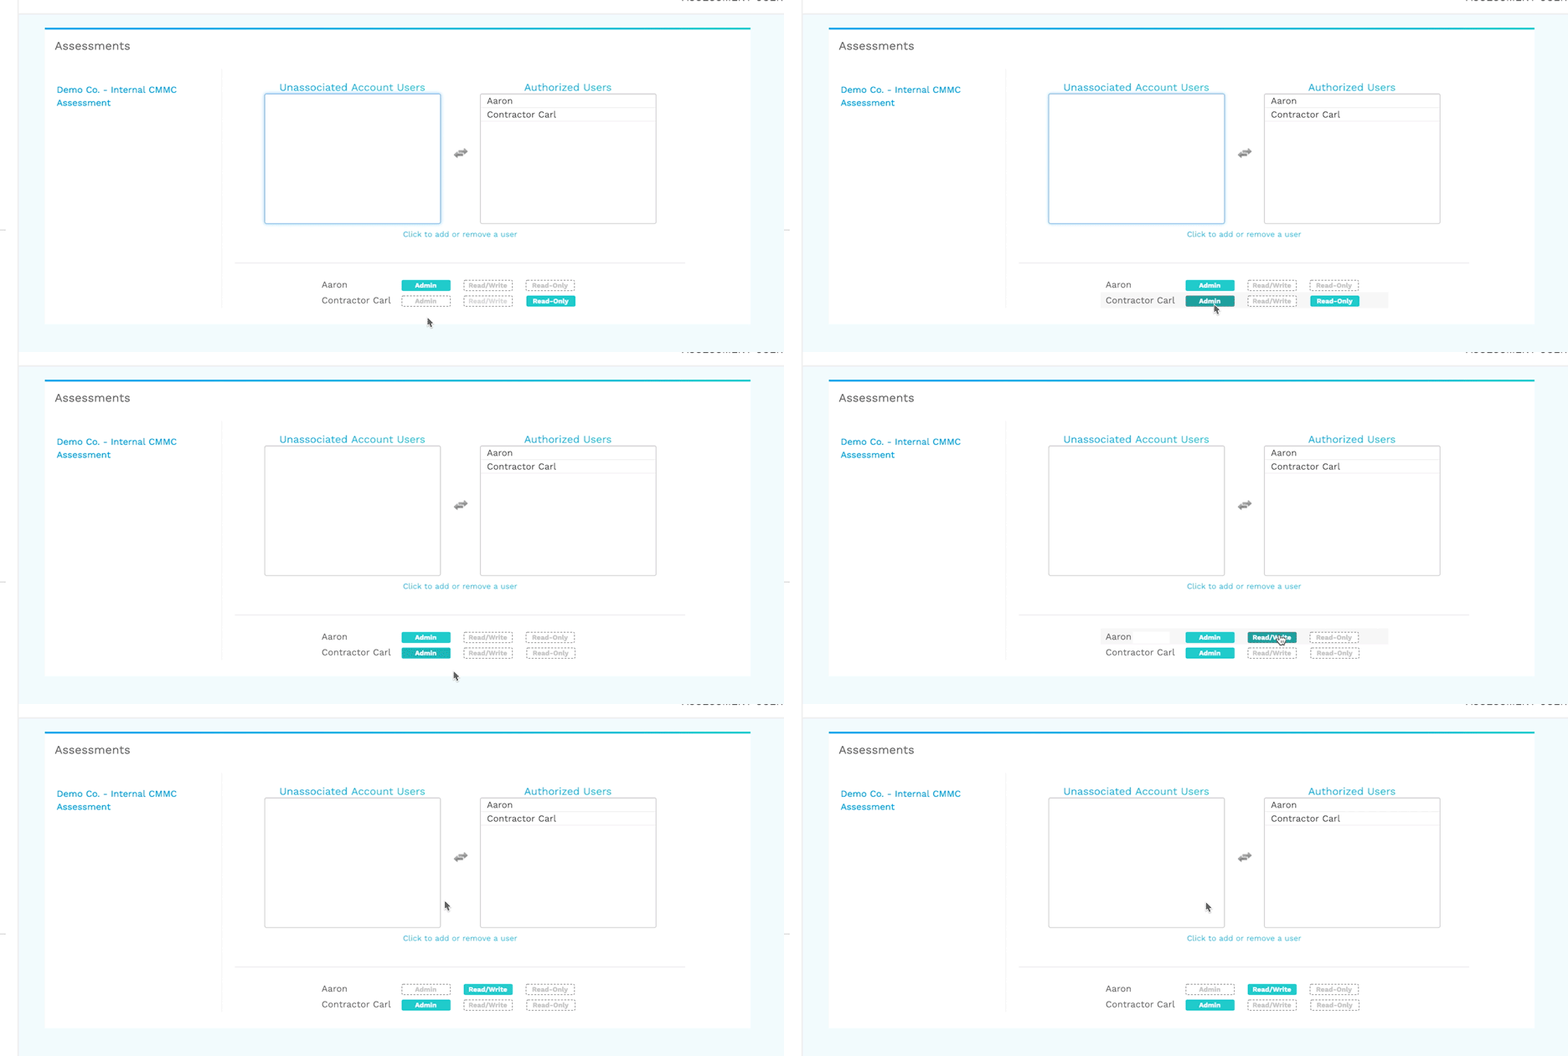
Once the user has been authorized, you have one of three roles that you can assign them:
- Admin
- Read / Write
- Read Only
Once a user has been grouped into the Authorized users category, their name will appear below. By selecting one of the three roles listed beside the individual user’s name, you will assign that role to that individual.
This option will not be account wide; it will only be effective in the assessment that you have selected and are modifying.
As an example, if Aaron is the account admin but wants to give admin controls to Contractor Carl, he is able to do so while maintaining his account admin role. Any roles assigned under “Assessment users” directly impacts the selected assessment only.


